How to Choose a Date Range
You can set the dates a report covers, and compare them with an earlier period, from the controls at the top of the report.
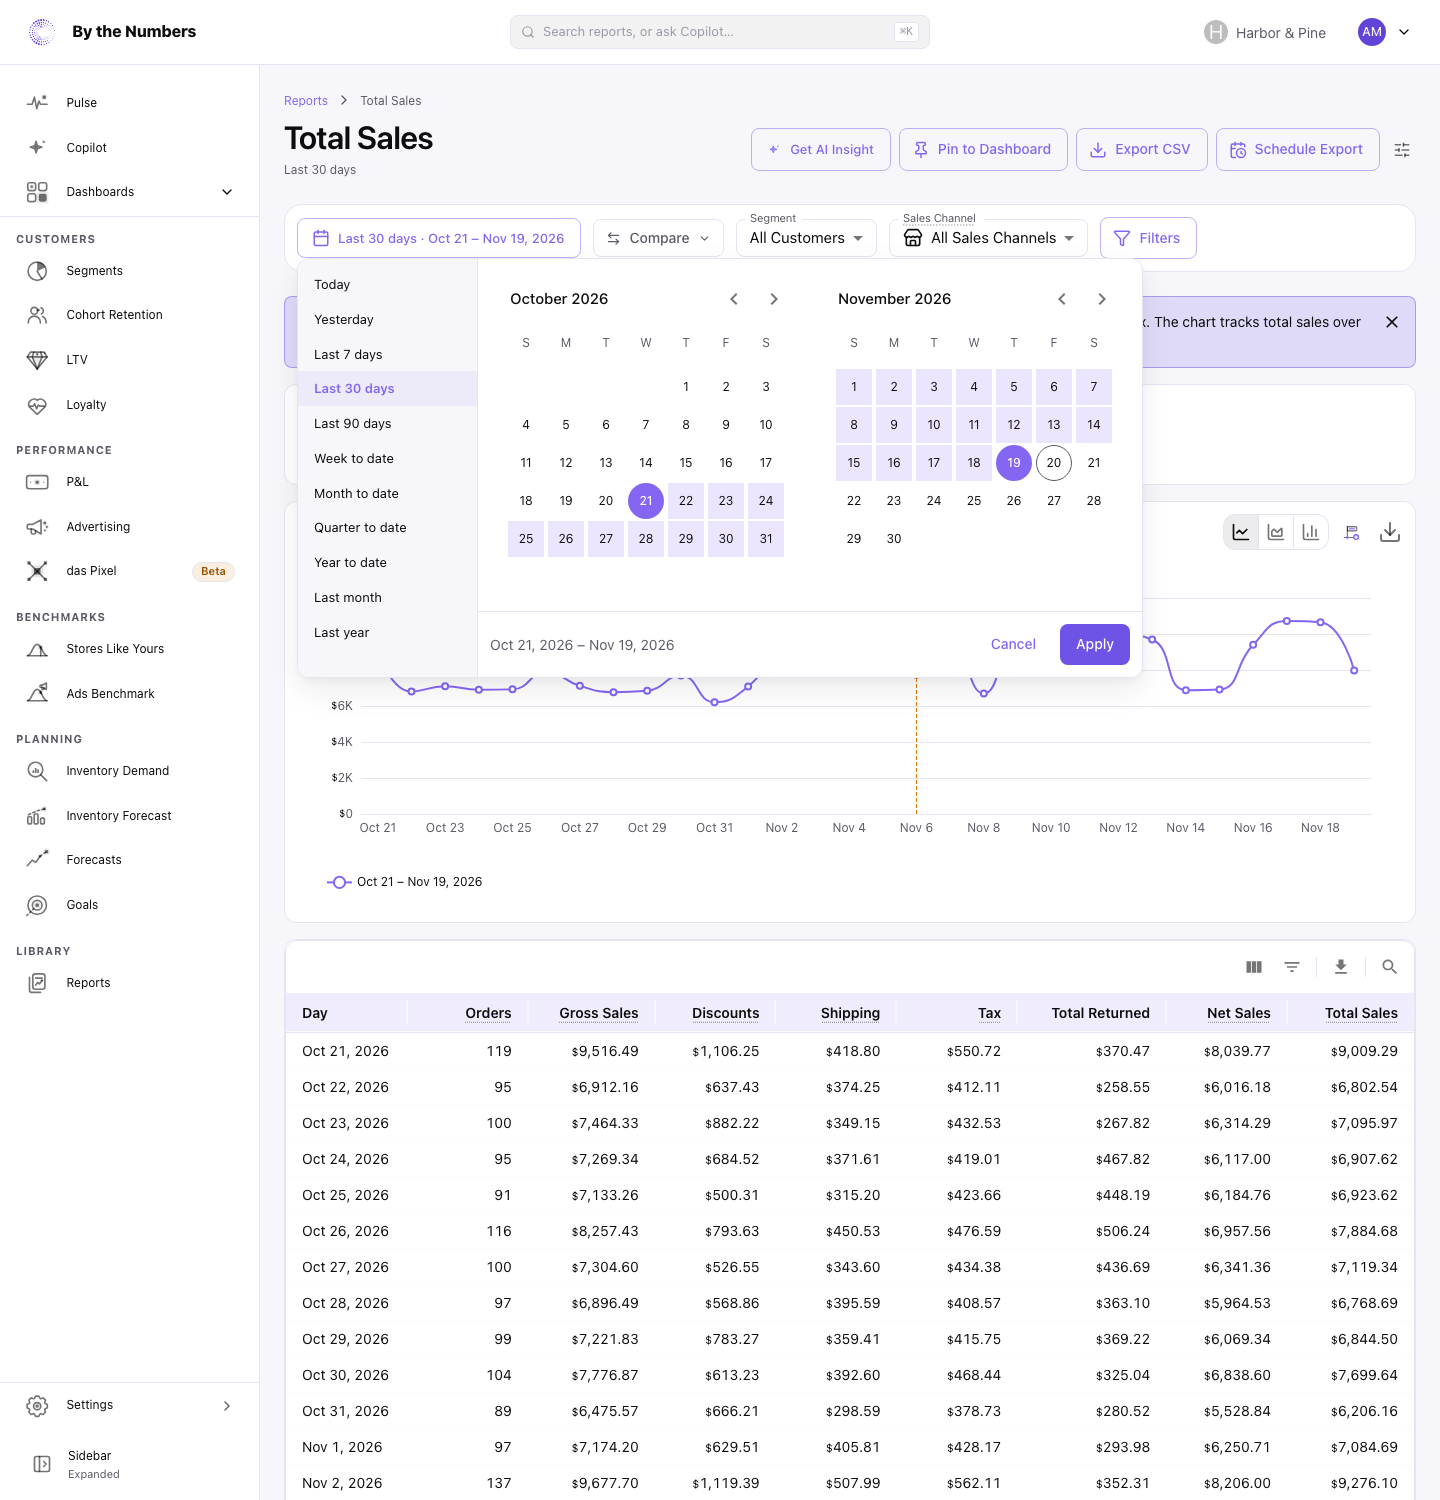
Steps
- Open a report.
- Click the date range button, the first control under the report’s title. It shows the current range, for example Last 30 days · Sep 2 – Oct 1, 2026.
- Click a preset on the left. It applies straight away.
- Or, for your own dates, click a start day on the calendar.
- Click an end day.
- Click Apply.
Cancel closes the picker without changing anything.
The presets are:
- Today and Yesterday
- Last 7 days, Last 30 days and Last 90 days: that many full days, ending yesterday. Today isn’t included.
- Week to date, Month to date, Quarter to date and Year to date: from the start of the week, month, quarter or year up to and including today. Weeks start on Monday.
- Last month and Last year: the whole previous calendar month or year.
Compare With Another Period
Compare sits next to the date range button. Reports with longer ranges, such as the cohort reports, don’t have it.
- Click Compare.
- Under Period, choose Previous period, 1 year ago, 2 years ago or Custom range. Each option shows the dates it covers.
- If you’d like, pick a different Segment for the comparison, or add Filters where the report has them.
- Click Apply.
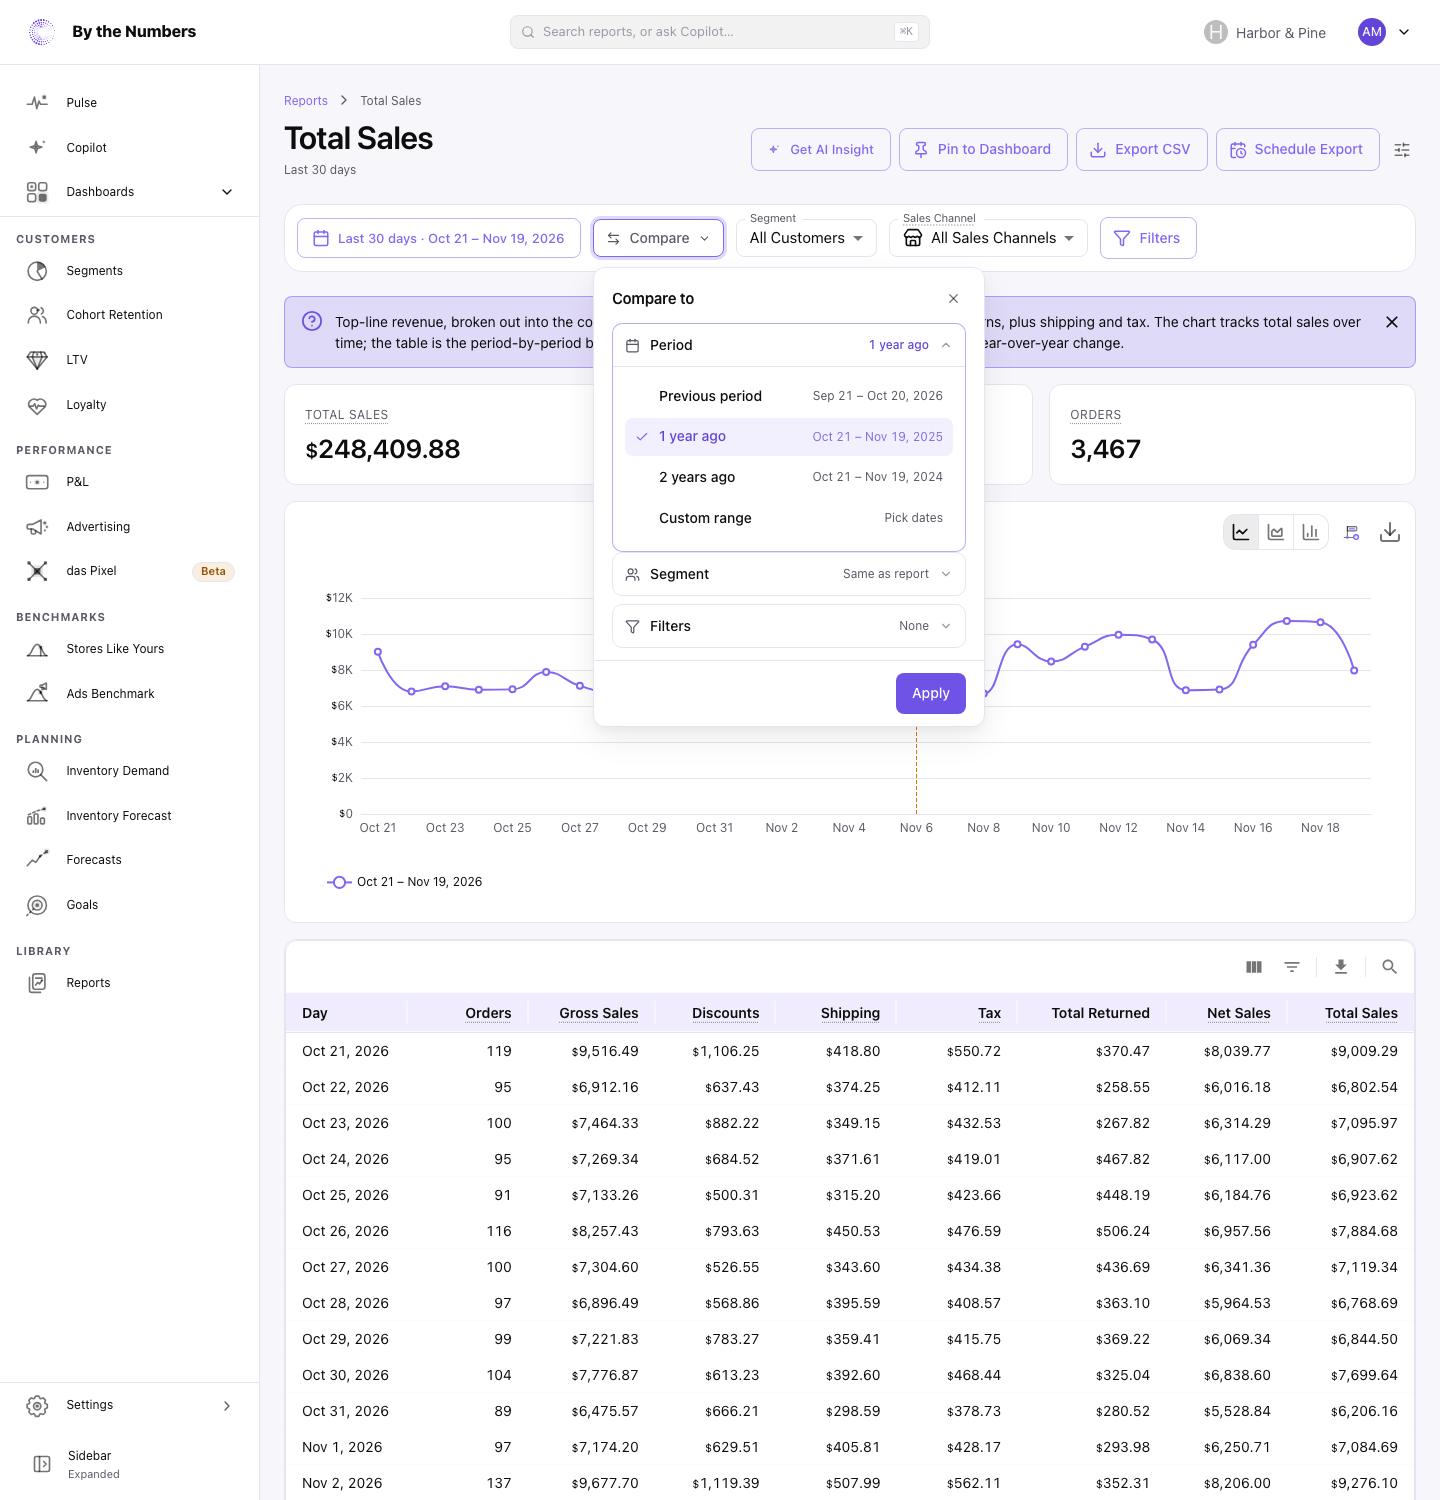
The button then names the comparison, for example vs 1 year ago. How Previous period is chosen depends on your range:
- For Last 7 days, Last 30 days, Last 90 days and your own dates: the same number of days just before.
- For Last month and Last year: the whole month or year before.
- For a “to date” range: the same number of days from the start of the previous week, month, quarter or year. On the last day of a week, month, quarter or year, it’s the whole previous one.
1 year ago and 2 years ago move both dates back by 1 or 2 years.
To turn the comparison off, click the ✕ on the comparison button. The report stays uncompared, even if you’ve set a Default comparison. Pick a comparison again whenever you want one back.
Set Your Default
Each report opens on your default range unless its link already has one. To change it:
- Open Preferences.
- Click the Reports tab.
- Choose a Default date range and a Default comparison.
- Click Save Preferences.
Without a default, reports open on Last 30 days with no comparison. Each person on your team sets their own.
What Happens Next
The report reloads for the new dates. Its numbers use your store’s time zone. The dates on the button use your computer’s time zone, so near midnight they can be a day apart.
The range and comparison are saved in the page’s link, so a link you bookmark or share opens with the same choices. A preset such as Year to date is worked out again each time the link is opened.
Reports With Longer Ranges
Reports that follow customers over time, and the LTV page, offer longer ranges instead: from Trailing 2 months to Trailing 8 years. Cohort Retention, Cohort Repurchase Rate, Product Cohort Retention and Visitor Retention are among them.
They have no calendar and no comparison. They open on Trailing 1 year unless their link has another trailing range, and your Default date range doesn’t apply to them.
A trailing range starts on the 1st of a month and runs to the end of the current month. Trailing 1 year therefore covers the last 13 calendar months, this month included.
Customer Loyalty has no date range. It always shows your customers as of the last refresh.